Cart
CartInstructions for Do-It-Yourself Roof Racks
Directions:
To construct your rack, you first have to decide what length 2x4 you will need. If you are going to be hauling two canoes, we would recommend using a 78" 2x4. If you are hauling only one canoe, use a 2x4 that is slightly larger than width of your vehicle.
Bolt the suction cup frames to the 2x4's so the cups are to the outside edges of your roof, by drilling a 3/8" hole (or a little bigger, if you want to remove it later - to allow for wood swelling).
Set the rack on the roof to see where to place the buckles so that a strap through the door openings to the buckles will be pulling straight down. Drill two more holes for each buckle location and bolt on the strap buckles. Then, place black eyepads on the ends of the 2x4's where you wish, and bolt them on. Eyepads are to give you anchor points to strap canoes (or other loads) to. Generally, there would be 2 eyepads on top of each rack, one at each end.
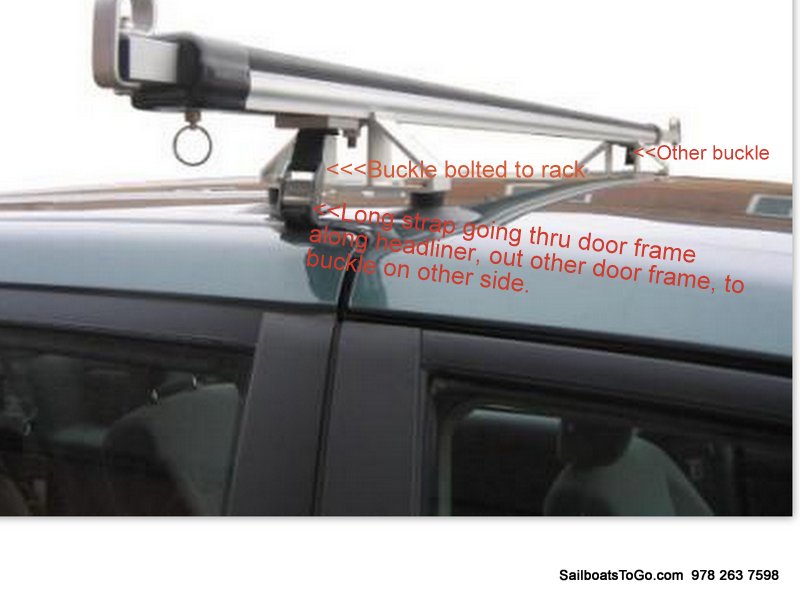
Black strap must be placed through the cab of vehicle by opening doors and then snug down securely in the buckles.
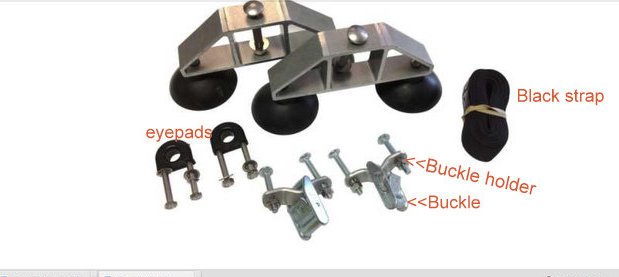
Parts: Kit includes 2 Suction cup frames and bolts, 2 black eyepads and bolts,
2 buckles with brackets ("buckle holders")
1 strap.
To make 2 carrier bars, you need 2 kits.
The DIY rack straps to the vehicle just like the ready-made rack. See picture below of how ready-made rack straps on: